

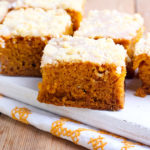
There is no better way to give thanks than with a tasty dessert! That's why Birthright…


Ever since I can remember, Israel has been a big part of my life. My grandparents have a second home in Israel and as kids, we’d go for the entire summer. The minute we landed my mother would start breathing in the air through her nose, almost like she never experienced oxygen before, and when it was time to leave she’d cry and get emotional in a way that wasn’t typical for her. She’d say to us, “Don’t you love Israel?” and I did, but it wasn’t until I was much older that I understood the significance. That I, too, would breathe in the air like I had never experienced oxygen, and that, when I had to leave, I would get more emotional than I’d like to admit.
I started cooking during my year in Israel. I was on Young Judea’s Year Course and I lived in an apartment with a bunch of friends. Every Friday morning before Shabbat I would call my Savta who was living in Israel and she’d talk me through the recipes. Roast chicken with vegetables Lukshon kugel, ratatouille, whatever came out of those conversations was always delicious. And it wasn’t just in the kitchen that I was indulging; I was also eating as though I’d never experienced food before. All of 2009 was a love affair with Israeli food and I had the number on the scale to prove it. Like “Eat, Pray, Love,” but I never even had to leave the country.
When I came back to America I continued to cook and host potluck style dinners with my friends in New York. As I got more into cooking, I found myself developing my own recipes and consistently leaning on the Israeli flavors. Some of the most popular recipes on my website are the ones that taste like Home – Smokey Roasted Carrots with Tahini, Cinnamon Stick Lamb Kebabs, Arugula Salad with Pomegranate and Pistachio. I cook with these flavors because they’re the flavors that I love, but more importantly, they’re my comfort food, my home, my happy place.
As an adult and an American Jew, I’m so grateful for organizations like Birthright Israel Foundation that give the opportunity to people like me to fall in love with Israel. Even though I had a lot of exposure to Israel as a child, I didn’t understand its significance until I was an adult which is why programs like Birthright Israel are so important to the Jewish future. I know that visiting Israel as an adult allowed me to tap into my passion, my hobby, and now, my career.
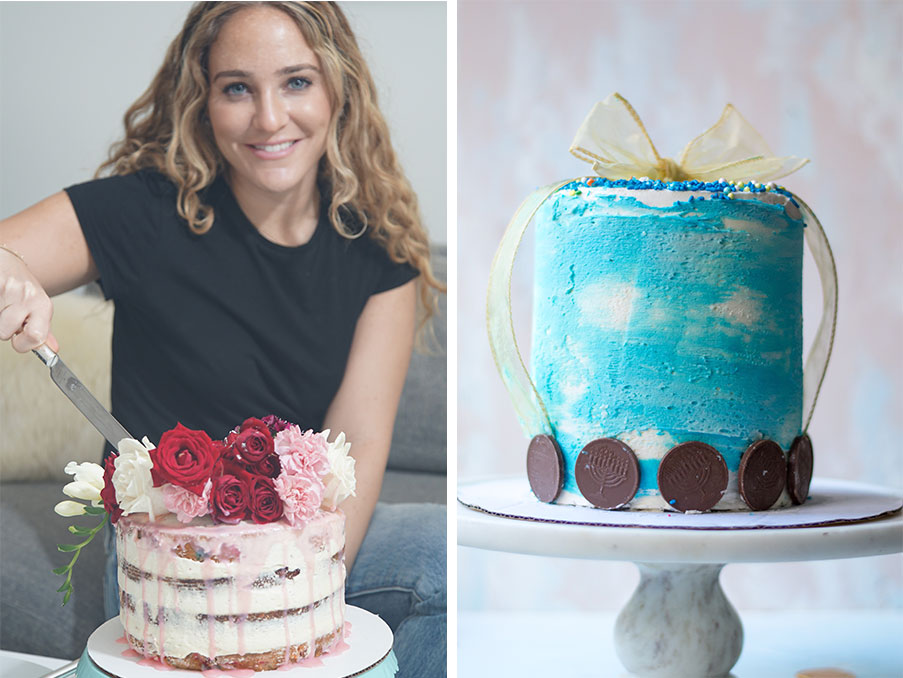
Hanukkah Surprise Cake
For the Cake
- 2 cups butter, softened to room temperature 4⅔ cups sugar
- 5 egg whites, at room temperature 1½ tablespoons vanilla extract
- 1½ tablespoons baking powder 6 cups all-purpose flour
- 3 cups milk, at room temperature Blue food coloring
For the Frosting
- 2 cups butter, softened to room temperature
- 2 pounds confectioners’ sugar
- 1 tbsp vanilla extract
- 2 tablespoons milk
For the Center of the Cake
- Hanukkah gelt
- Blue and white sprinkles
Directions
- Preheat oven to 350°F. Prepare four 6” cake pans. Grease them well and line with parchment rounds. Set aside.
- In the bowl of a stand mixer fitted with the paddle attachment cream together sugar and butter. Beat at a medium speed until fully combined.
- Slowly drizzle in the egg whites, then add the vanilla and the baking powder.
- Reduce the speed and add the flour and milk in three alternating additions, starting with the flour and ending with the milk. Continue to mix until fully combined.
- Separate half the batter into a large bowl. Add several drops of the blue food coloring to one of the bowls. Mix until the food coloring is fully combined. Add more food coloring until you reach your desired color.
- Separate equal amounts of the blue batter to two cake pans. Then separate equal amounts of the white batter into two cake pans. Transfer to the oven and bake until a toothpick inserted in the center of the cake comes out clean, about 30 minutes. (Check on them after 15 minutes as baking times will vary by oven).
- When the cakes are cool enough to handle, place a plate over the cake pan and flip the pan so that the cake flips out onto the plate. If the cakes are stuck, use a paring knife and scrape around the sides of the cake pan to gently separate the cake from the pan, then try to flip it again. Be careful not to do this when the cake is too hot because it could fall apart. Allow the cakes to cool completely. If the cakes are domed, use a serrated knife to trim the top of the cake to make it level. Then use a cookie cutter or the mouth of a cup to remove the center of three of the cakes. Leave one of the cakes intact. Once the centers are removed, wrap each cake in two layers of saran wrap, followed by one layer of aluminum foil. Freeze the cakes at least overnight, up to a month. (You can eat, save or dispose of the centers of the cakes. It’s entirely up to you.)
- When you’re ready to assemble the cake, remove them from the freezer (you can assemble them completely frozen.) Make the frosting: in the bowl of a stand mixer fitted with the paddle attachment beat the butter on a medium speed until it is very smooth and lightens in color, about 2 minutes. Lower the speed and slowly add in the sugar. Continue to mix until the sugar is fully combined and then add the vanilla and milk. Raise the speed to medium and continue to whip the frosting for about 5 minutes.
- Place a cake board or piece of parchment paper on a rotating cake stand or lazy susan. Place a dollop of frosting on the board and place one of the cakes with the center cut out. Generously frost the top of the top of the cake and then top with another one of the cakes without a center. You will want to alternate the colors (so if you started with a blue layer, top it with a white cake.) Frost the second cake, and top with the third cake making sure to line up all the cake layers so that they align.
- In a small bowl combine the sprinkles and gelt. Pour the mixture into the hole in the center of the cake. Frost the top of the cake and top with the last layer. The last layer should be the layer without the hole.
- Cover the entire cake with a thin layer of frosting and use a bench scraper to scrape off any excess. Place in the fridge for about 30 minutes to allow the first coat of frosting to harden.
- In the meantime, separate one heaping spoon of frosting into a small bowl. Add a few drops of the blue food coloring to the bowl and mix well.
- When the cake is hard to the touch, remove it from the fridge. Cover the entire cake with a second, thicker layer of the white frosting. Add a few dollops of the blue frosting sporadically around the cake. Then use the bench scraper again to scrape off the excess cake. You can add more frosting, including more of the blue frosting, and repeat this process as you like.
- Optionally: add a ring of gelt around the bottom of the cake. Secure the gelt by placing a little bit of frosting on the back of each one. Place a small plate on top of the cake and sprinkle sprinkles around the plate for an even ring. Top with a bow.
Born and raised in Brooklyn, New York, Michal is the quintessential “Nice Jewish Girl” with a passion for food that started early. At six years old she had her first lamb chops; the rest is history. It was in 2009 during her gap year in Israel that she discovered her passion for Jewish food, cooking and entertaining. Upon returning to New York, she studied Hotel and Tourism Management at NYU. During her time at NYU, her East Village apartment was home to a Shabbat meal almost every weekend.
In 2017 Michal started showcasing some of her meals via her Instagram account, @noshpitality. After fielding many requests for recipes, tips, and tricks, she decided to start her website, noshpitality.com, as a place where her recipes and advice could live. Currently, Michal lives in Manhattan, New York where she sells her baked goods and hosts cooking classes. Interested? Drop her a line: [email protected].

